Shirley Chisholm on Women’s Work
Shirley Chisholm(1924-2005) on WOMEN’S WORK, is located at the bottom of the stairs, wearing a lime green dress. She is situated between legislators and demonstrators marching forward down the stairs. Shirley, known as a courageous, and tireless champion for the poor and working class, is famous as the first black woman to serve in Congress. She was also the first black female presidential candidate from a majority political party.
Fierce Advocate
Born Shirley Anita St Hill on November 30, 1924 to Caribbean Immigrants from British Guyana and Barbados, her father was a factory laborer, and her mother was a domestic worker and seamstress. The family lived in the Bedford–Stuyvesant neighborhood of Brooklyn. Believing it would provide a safer environment, Shirley’s parents sent her and three younger sisters to live with their grandmother on the island of Barbados. The girls lived there for about 7 years. Shirley attributes much of her success to the early education she received in the traditional British school system of Barbados. Upon her return to New York City at the age of 10, she performed well in the integrated, but mostly white classrooms.
After high school, Shirley earned a Bachelor of Arts at Brooklyn College where she also won awards for debate. Then, she worked in an early child care center, married Conrad Chisholm, and earned her Masters in Elementary Education from Columbia University. She worked her way up to director of the Hamilton-Madison Child Care Center in the 1950’s, and became an educational consultant to New York City’s Bureau of Child Welfare from 1959 to 1964.
Shirley learned to fight for social justice in her teens from her father who was an active member of a labor trade union. Her confidence, speaking skills, and grit made her an effective advocate for civil rights, women’s rights, and workers rights. She was elected to the New York State Assembly in 1965, and became the first black woman elected to the US House of Representatives in 1968. She served her constituents as a fierce, and vocal legislator.
Unbossed & Unbought
Shirley’s campaign slogan, “Unbossed and Unbought,” was an apt description. At first, Shirley
was appointed to the Agriculture Committee. This was the result of efforts by Southern
congressmen to put her in a place where she would have little influence or power. Angered, she waged a campaign to be reassigned. This was unheard-of since freshmen representatives were expected to follow the rules without complaint. In the end, Shirley got her way, but not before she found a silver lining in agriculture. In the late 1960’s farmers in the midwest had surplus food that they couldn’t sell. Shirley teamed with Senator Bob Dole from Kansas and, together, they started what would become the Food Program for Women, Infants, and Children (WIC) to provide food supplements to at-risk women and their infants.

Congressional Black Caucus.
During her seven terms in Congress, Shirley successfully helped pass numerous pieces of legislation that gave voice and power to those who were ignored by the government. She opposed the VietNam War and fought to reduce military spending in favor of increasing funds for domestic social programs. She pushed through legislation that expanded funding for day care and education, and expanded minimum wage protections for domestic workers. In support of women, Shirley hired only females to work in her congressional office, and half of her staff were black.
Presidential Run
Finally, in 1972, Shirley decided to run for President as the Democratic candidate. She became

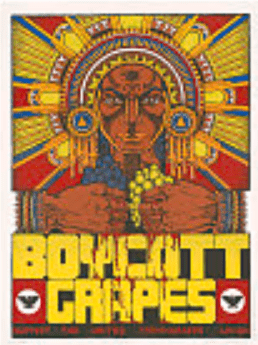
Campaign Poster
the first black candidate from a major party, and the first woman Democratic party candidate. A major obstacle for her campaign, were the black male colleagues within the party. Shirley claimed that she faced more discrimination for being a woman, than for being black. Winning the nomination was a long shot, but, Shirley hoped to amass enough support to be able to influence the party platform. She planned to demand a black vice-presidential candidate, and insist on diversity in cabinet, and agency appointments.
Shirley invited all to “Join me on the Chisholm Trail” as she campaigned across the country on a shoe-string budget, and heavy reliance on volunteers. Her policy positions included support for:
- Anti-poverty legislation

Shirley speak at Democratic Nat’l Convention
- Ending the VietNam war
- Abortion rights
- Gay rights
- National health insurance
- Legalization of marijuana
- Fair housing laws
- Busing as a temporary means to desegregate schools
Shirley built a broad coalition of supporters, but, she did not win the nomination. She did, however, come in 4th in a field of 15 candidates at the Democratic Convention. She inspired women worldwide, and was voted as one of the 10 most admired women in the world. After the election, Shirley returned to Congress where she served another 10 years. In retirement, she remained involved in many political organizations, spoke at colleges to encourage student activism, and continued to fight for women’s rights.
What about those demands at the convention…
In her run for president, Shirley hoped to gain the clout to demand a black vice presidential running mate, and diversity in cabinet and agency appointments. That was in 1972. Not until the election of Joe Biden and Kamala Harris in 2020, nearly 50 years later, did those demands became a reality. At the inauguration ceremony, Harris wore purple as a tribute to Shirley Chisholm whose campaign colors were purple and yellow.
My take away…
The pace of equality is much too slow. In researching Shirley Chisholm, I must confront the question, “What are you doing about it?”.
As a high school teacher, I work with many students from marginalized groups: young women and children of immigrants. They often do not have a family history of education or activism, so, I try to plant those seeds. I challenge students to be the first in their families to graduate from high school, to set a goal of attending college, and to register to vote. These steps can change the path of an entire family for years to come.

1st Time Voting
In the 2020 election, a former student contacted me because she wanted to vote. She didn’t know how, and no one she knew had ever voted in a US election. Over the phone, I talked her through the registration process. When her ballot arrived, I explained each of the issues, and shared a booklet from the state voting commission with more information. After talking her through marking and sealing her ballot, I drove her to the drop-off site and told her, “Next time, bring two friends and we’ll do this again.”
See the Women’s Work Quilt
See Ida B Wells on Women’s Work in person. This quilt will debut as a featured work in the exhibit Women’s Voices, Women’s Votes, Women’s Rights, at the Clinton Presidential Library, in September 2021. Look for more details on the Events page of this website. Follow this blog for more stories of amazing women. Follow this link to see more of Lea’s Portrait Quilts.
Learn More About Shirley Chisholm…
Michals, Debra. “Shirley Chisholm.” National Women’s History Museum. 2015. www.womenshistory.org/education-resources/biographies/shirley-chisholm.
History, Art & Archives, U.S. House of Representatives, ““Catalyst for Change”: The 1972 Presidential Campaign of Representative Shirley Chisholm,” https://history.house.gov/Blog/2020/September/9-14-Chisholm-1972/(January 30, 2021)
Shirley Chisholm: First African American Congresswoman (March 31, 2020). Timeline-World History Documentaries. https://www.youtube.com/watch?v=Fz-dfJIprkY
Shirley Chisholm Biography, Encyclopedia of World Biography, (January 30, 2021). https://www.notablebiographies.com/Ch-Co/Chisholm-Shirley.html
Dovid Zaklikowsk (January 20, 2021) Turning Disappointment Into Food for the Hungry. The Rebbe.org. https://www.chabad.org/therebbe/article_cdo/aid/558041/jewish/Turning-Disappointment-Into-Food-for-the-Hungry.htm
History.com Editors (December 10, 2020). Shirley Chisholm. A&E Television Networks. https://www.history.com/topics/us-politics/shirley-chisholm

 My goal is present enough new content, information, tools, and ideas that everyone, no matter
 presented in each Color & Composition 1 lesson. This could be something simple that uses one of the concepts presented, or something more complex, with multiple concepts applied. We will begin sessions 2-6 with show & tell time where we learn from each other and celebrate creative efforts.


 Next, I convert each image to grayscale mode so that I can impose my own color scheme (more on that in a future post). Sometimes, elements of similar value begin to blend together, so I use the pencil tool to draw in important lines that have disappeared. In this case, I needed to outline the mountain lion to keep him separate from the rock and the foliage. Because they were darker values, I used a white line. However, sometimes, a black line is more effective.


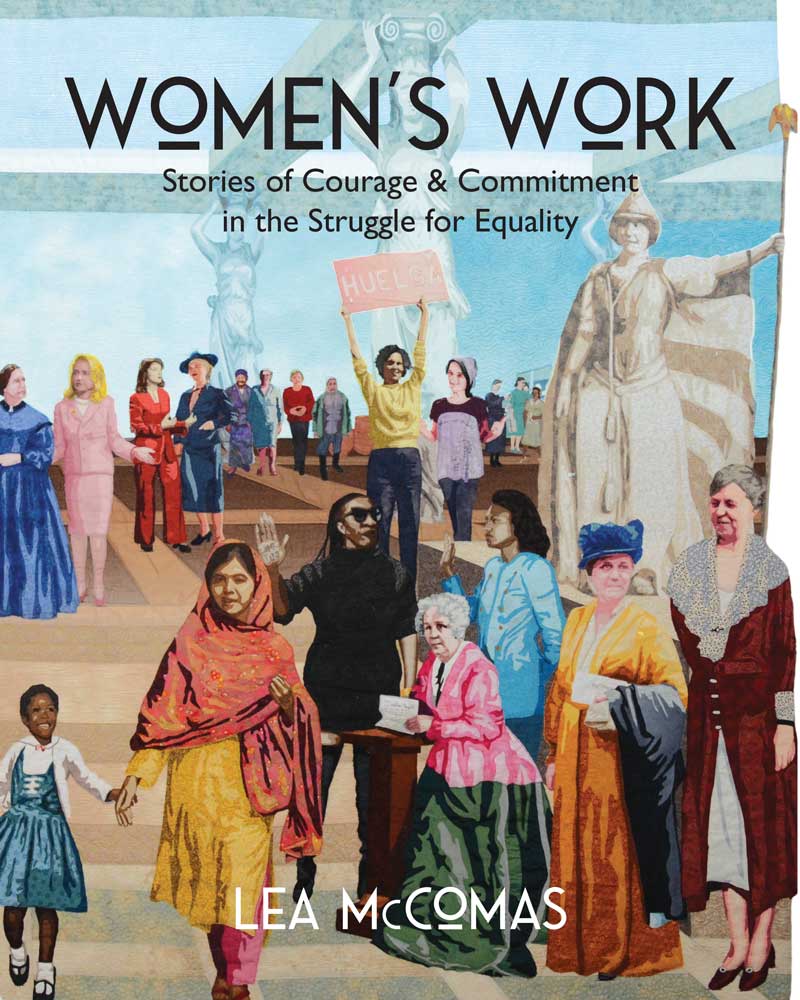
 Find Dolores Huerta (1930- ) Women’s Work standing on the upper level holding a sign that says “HUELGA” (Strike). She is chosen for her efforts to improve the horrible conditions of farm workers in America, and her work to organize grass roots activism in communities that struggle. Today, in her 90’s, she continues to fight and organize.