Tag Archives: faces and hands

Body Work

I’ve reached a place with my latest piece where I need to finalize a color scheme before moving on.  So far, I’ve only chosen fabrics for the flesh.  As I put these various body parts together, I’ve got to fill in the other elements of the composition (ie. dress, phone, background, hair.)  I use my Itten Color Star to work this out.

Color Scheme

Color Scheme


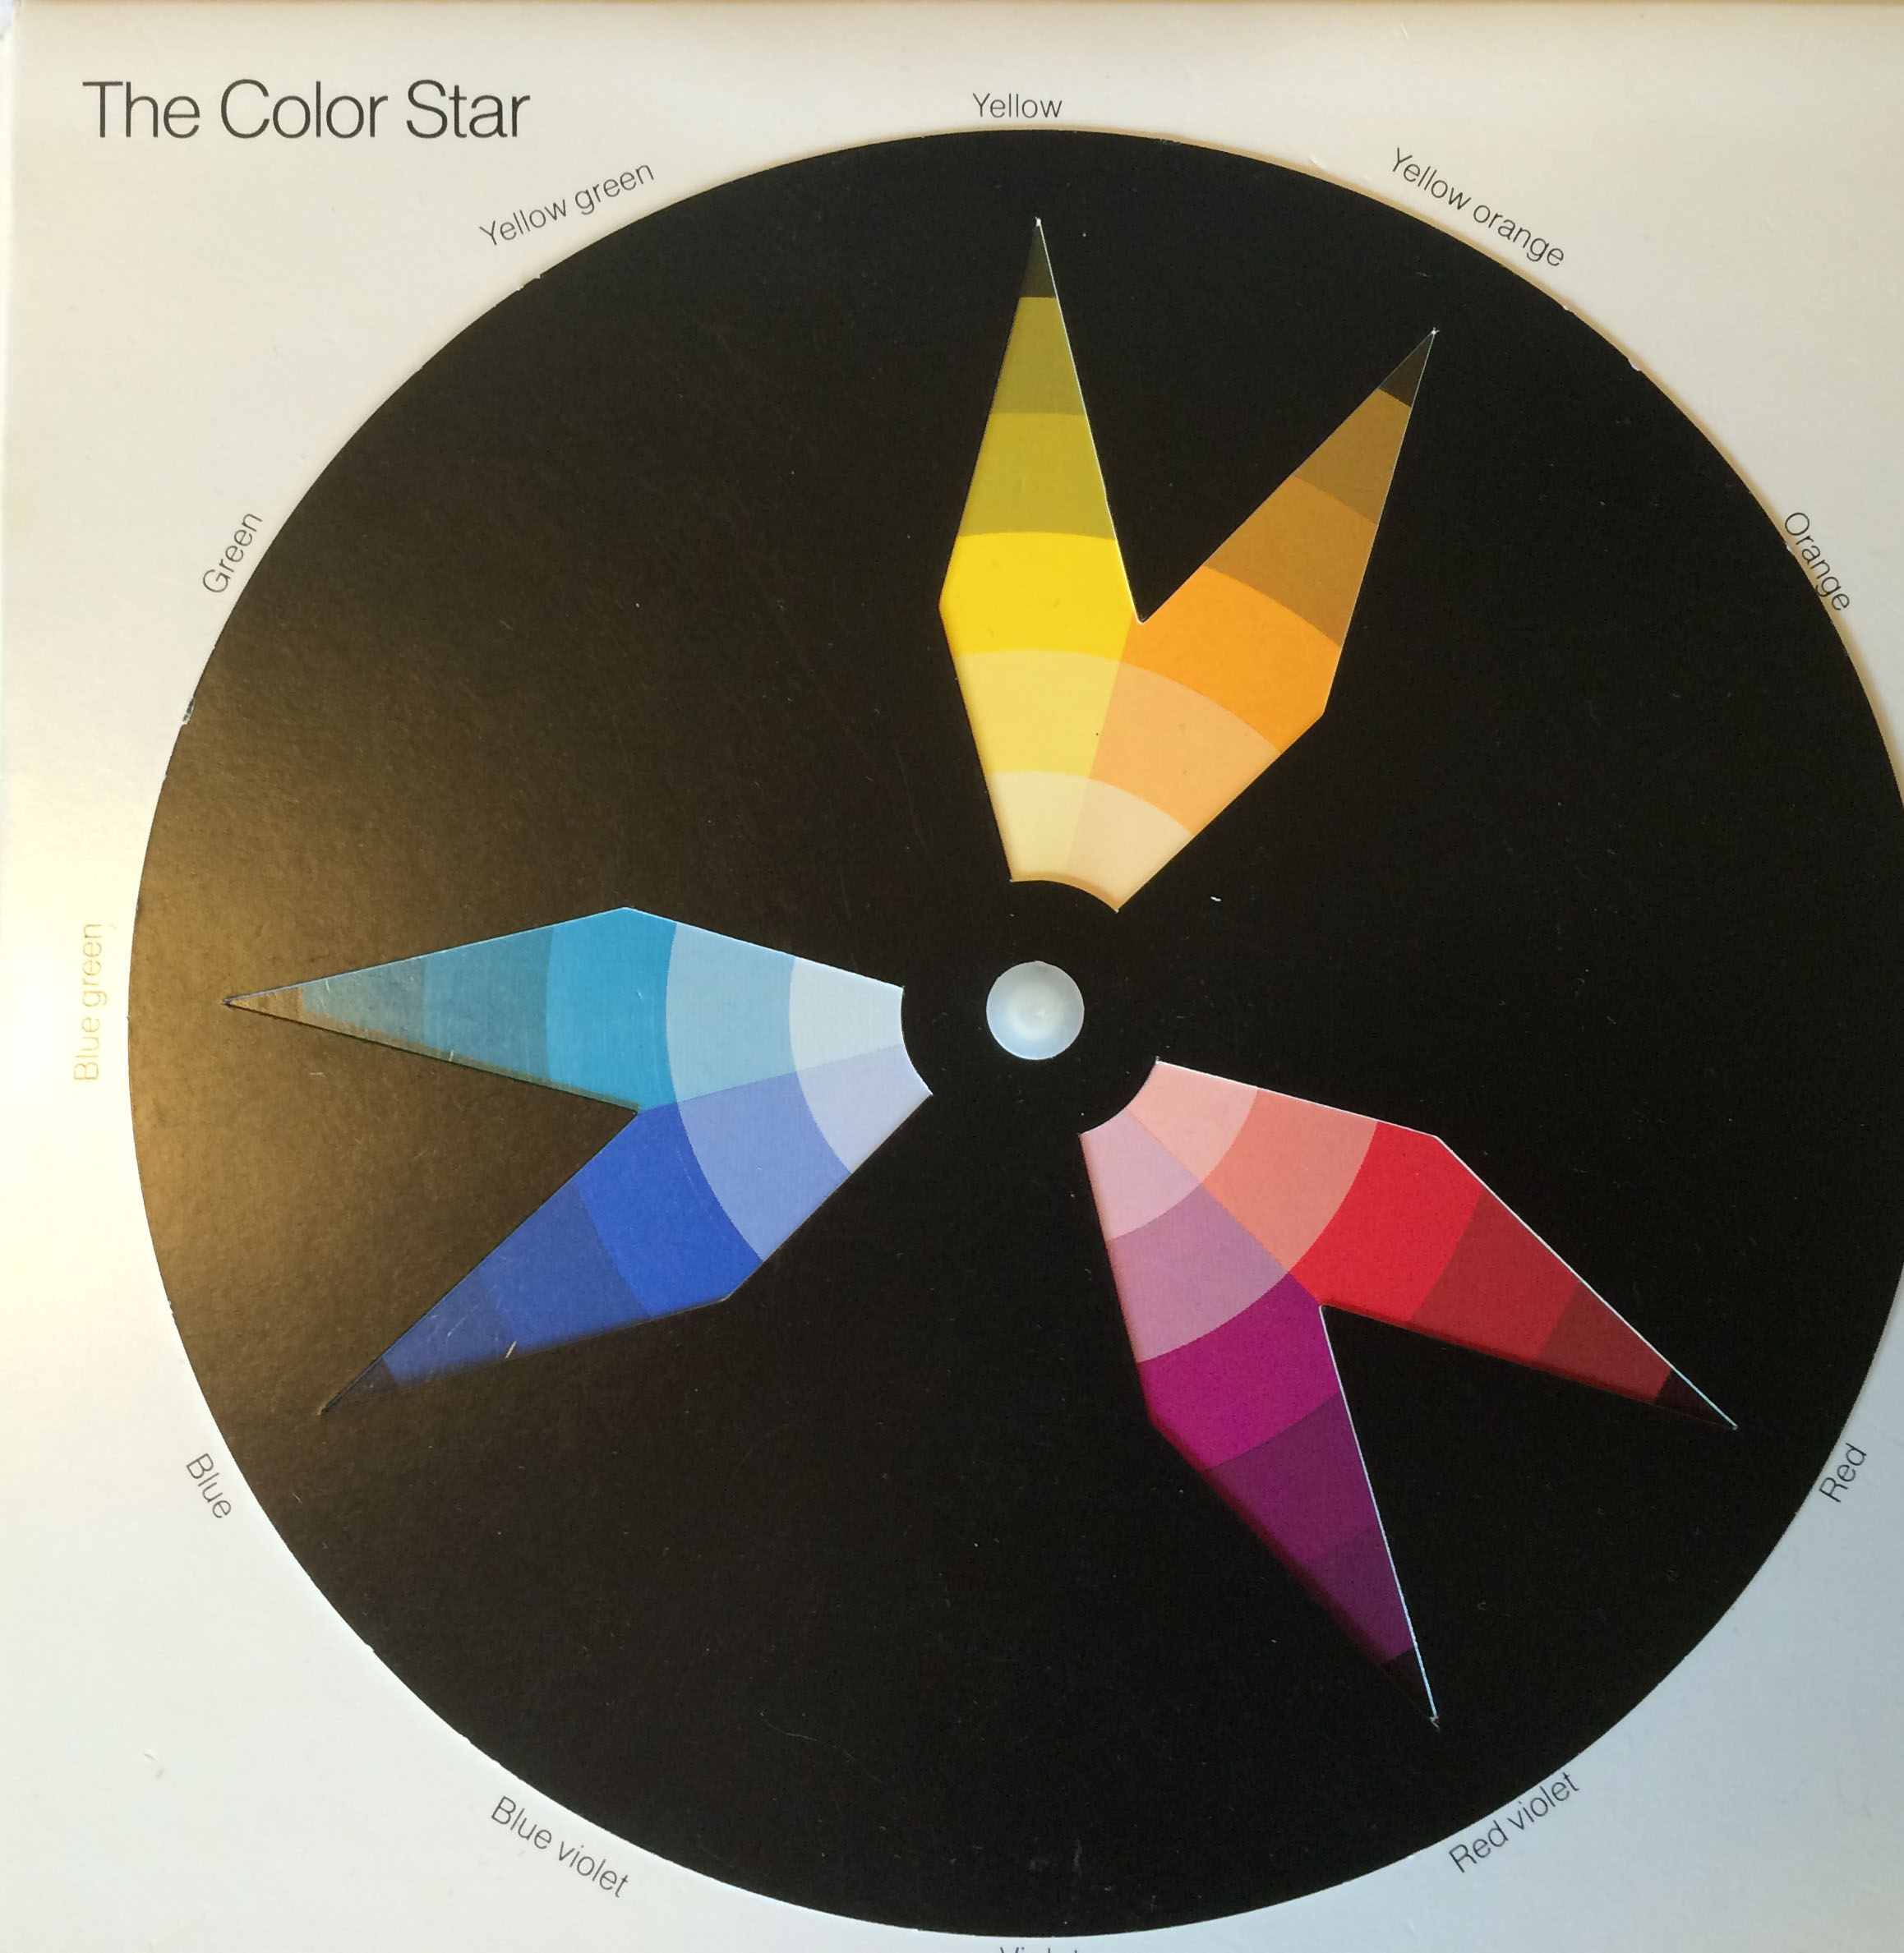
This Color Star is my favorite color wheel for making these kinds of decisions.  It comes with a full set of templates that let me block out colors I don’t want to use and let’s me get a better sense of what colors I will be  incorporating.

The hair is going to include yellow and yellow-oranges, while the phone will be blue-green, and her dress will be blue.

No decisions on the background yet, I’m going to put the figure all together and let it talk to me (or perhaps text me).

This week I’m able to complete the body along with the hand holding the phone. I’ve dipped into my special stash for the phone.  It is made from some hand marbled fabrics I picked up in Venice back in the 90’s.

A body to go with the hands

A body to go with the hands

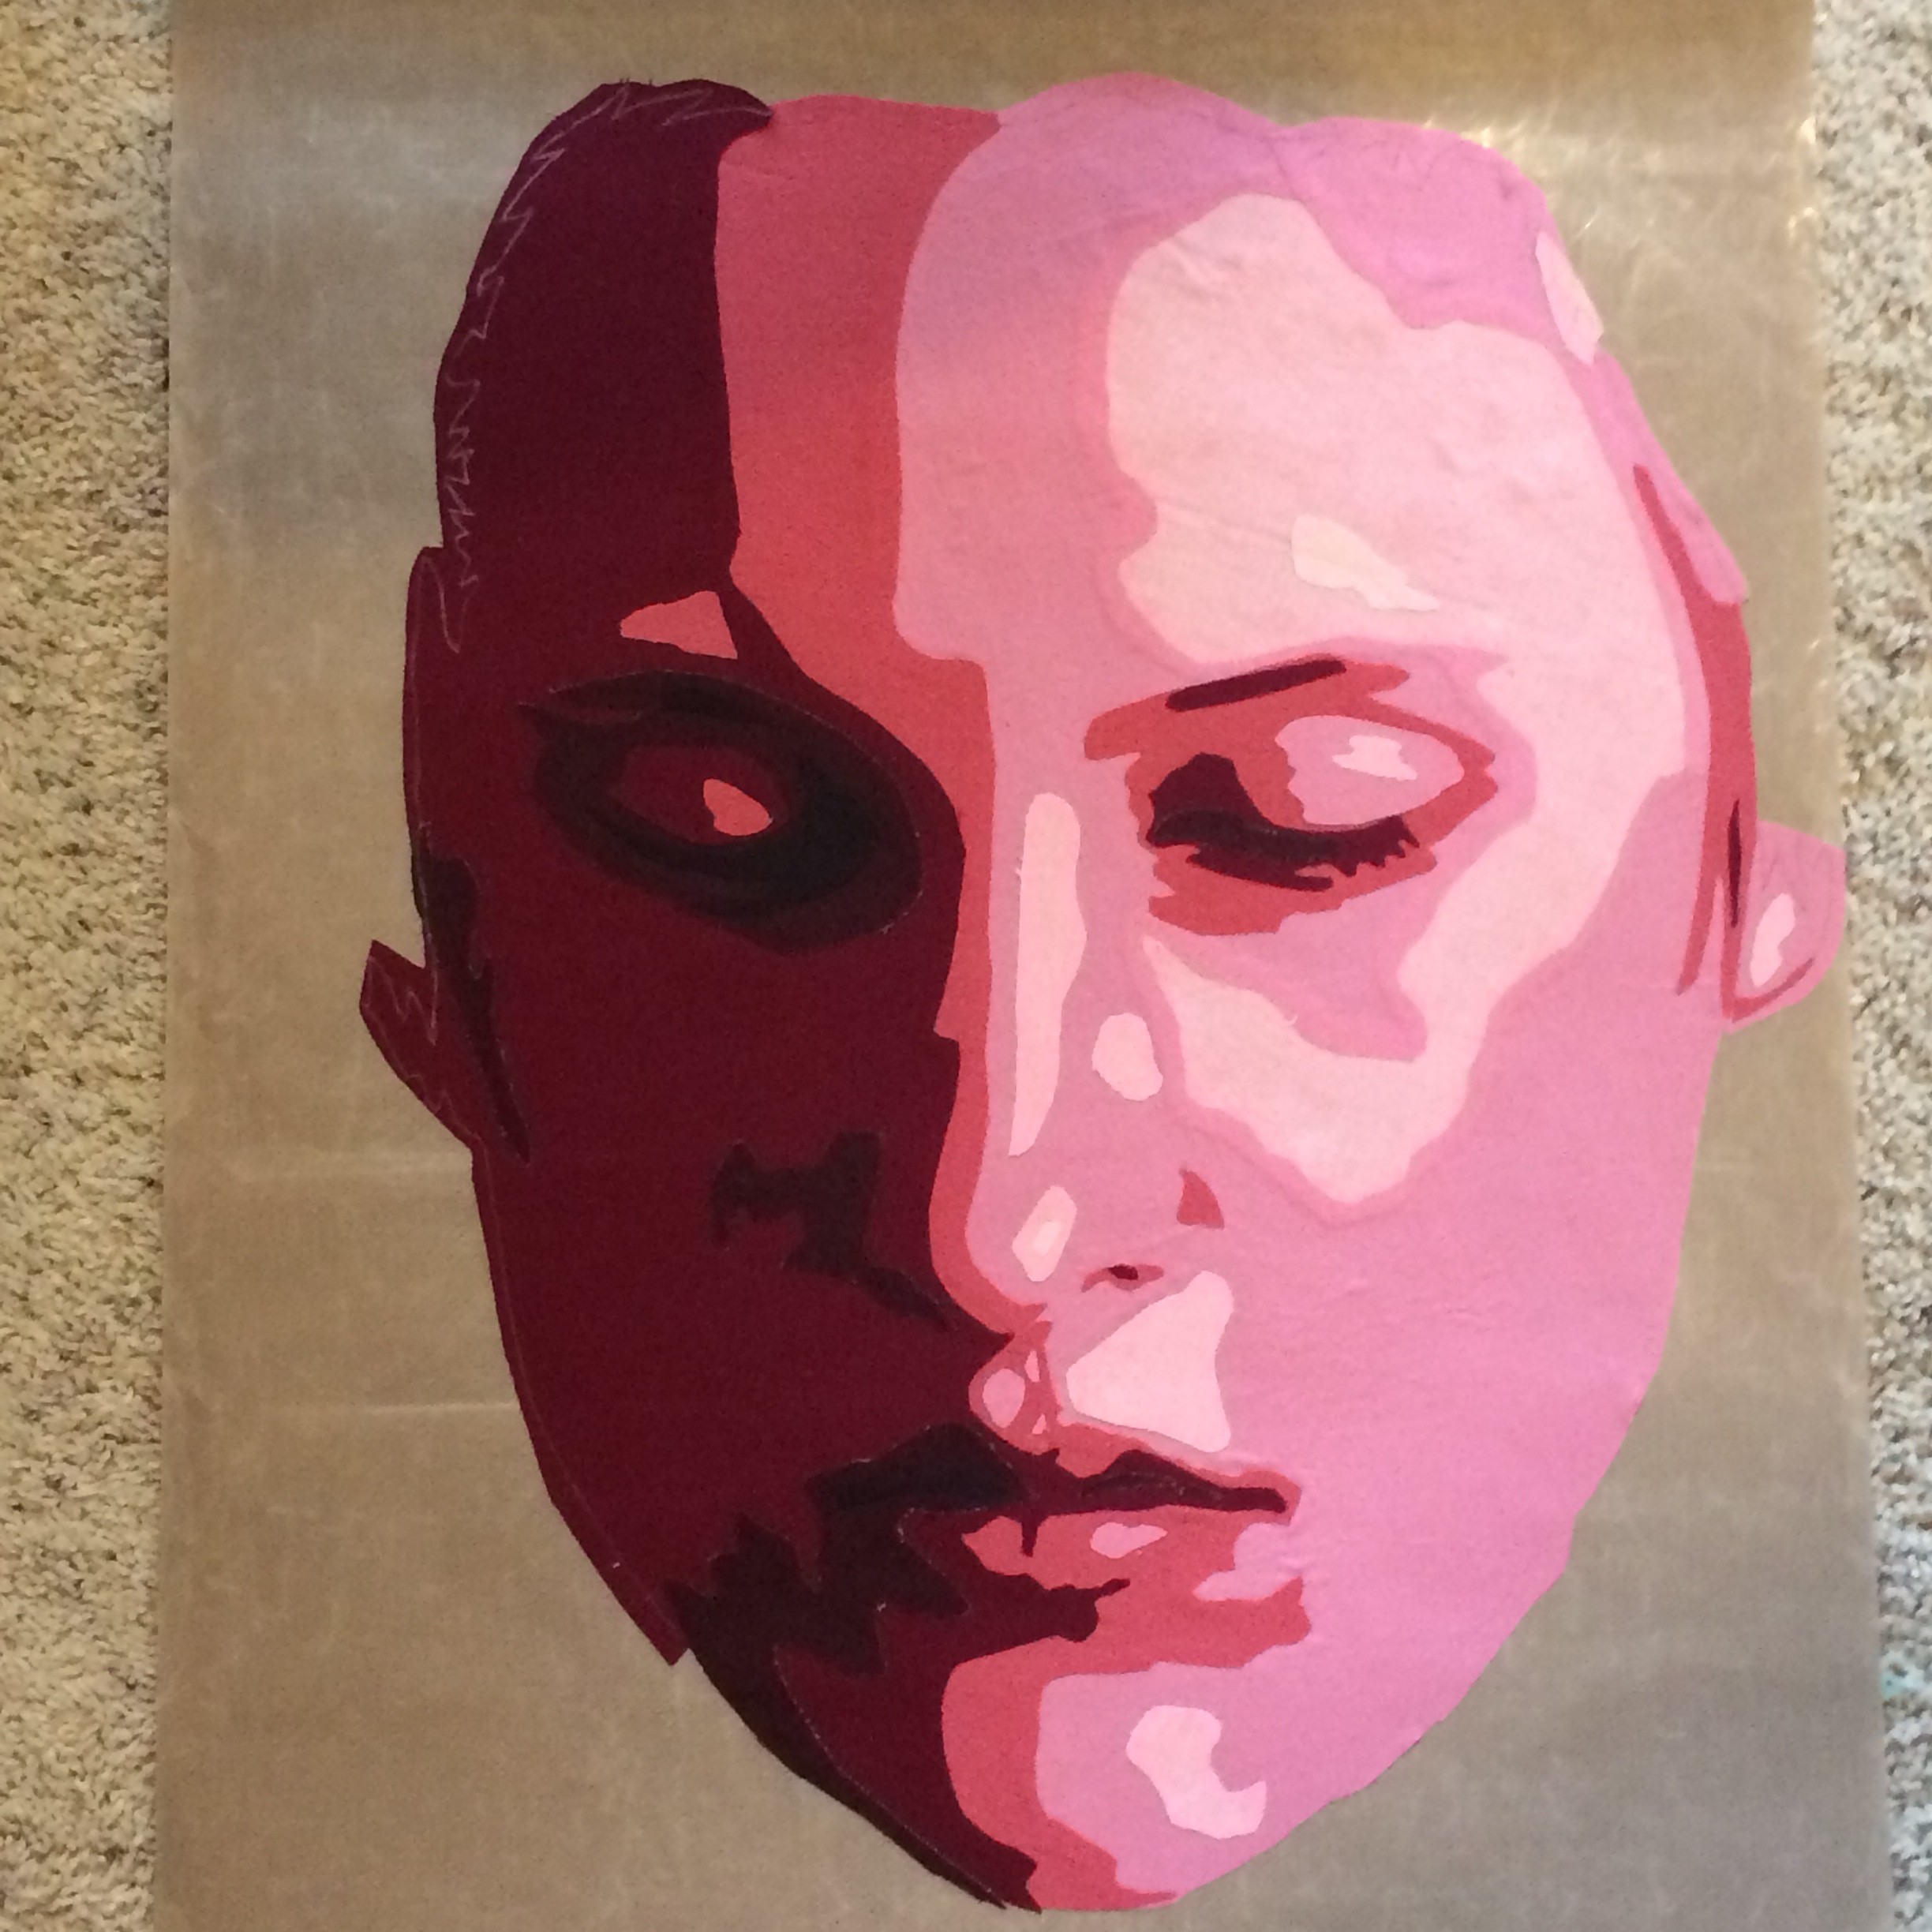
Placing the face with the body, I have a real sense of progress.  I’m not sure about the darkness of the upper body, but I’m going to move forward.  I’ll audition some background fabrics before I decide whether or not to replace the body with lighter values.

A face with the body

A face with the body

Share

Talk to the Hand

The fusing has begun.  This week I was able to put together the hand for “We Don’t Talk”.   It is created from warm red-orange flesh tones that I hope will pop off the surface and give it a real “in your face” feeling.  For greater realism, I’m working with 7, rather than my standard 5 values.

The hand

The hand

Next, the face emerges from those cooler red-violet fabrics.  You can begin to see that there is a significant contrast in the temperature of these 2 features.  I hope it works as planned.

The face

The face

I’m liking the detail in the eyes and mouth.

Next week I hope to fuse the body and put the pieces together.

Share

Fused Applique Portrait Class

My Fused Applique Portrait class at CraftU begins March 7. There is still time to sign up. Here’s a link if you are interested:

Fused Raw-Edge Applique Portraits

https://www.craftonlineuniversity.com/courses/fused-raw-edge-applique-portraits

 Here are some samples of portraits done with this technique:

portrait-Jim Lea applique portrait

Share

Is Your Face in the Right Place?

I’ve just finished a new piece titled “Simple Pleasures”.  It features a young boy named Indigo who is celebrating his 6th birthday and is thrilled with his new plastic horse.  How wonderful to find such pleasure in something that has no bells, whistles, screens, login, or even batteries.

In this weeks video, I show you how to check the size, location, and dimensions of facial features so that the face looks realistic and well proportioned.

Golden Mean Calipers Pt 3: Facial Features

This piece was a chance for me to try a bolder color scheme.  I like the energy and vibrancy of it. Below are process photos to show how the piece came together.

Face and Hands

Face and Hands

Shirt and shorts

Shirt and shorts

Horse in Hands

Horse in Hands

Thread-painted face

Thread-painted face

Finished piece

Finished piece


Share

See Me on The Quilt Show

I recently taped an episode of TheQuiltShow.com with Alex Anderson and Ricky Tims.  Subscribers to that website got to see that episode last week.  Many thanks to those of you that sent kind words through email and Facebook.

sitting talking

Photo by Gregory Case

Now, I can share a link to that show with the rest of you. Click on the link here and you can watch too.

Watch The Show

This link will work until May 11, so make a cup of tea and sit back to enjoy.

Let me know what you think Also, for those of you that subscribe to The Quilt Show, I have a new series of lessons in the “Classroom” section of the website.  This course is on “Contemporary Batik”  If you’ve ever wanted to try batik, but were afraid of the mess, check out this class.  It will be FUN, and EASY!! http://thequiltshow.com/learn/classrooms FTI: you have to be a subscriber to the website to access this class.

Share

Just the Right Face

Too much shadow.

Too much shadow.

The second figure has come together, but I don’t like the face.  Even though it is turned away from the viewer, it is still important to get it right.


Hair and face distinguished.

Hair and face distinguished.

First, I don’t like that the head is a solid black shape as it creates too much shadow.  Replacing part of that black shape with brown helps to distinguish the hair from the face.


reference tools

reference tools

With that done, my attention now turns to the line of the profile. To make it accurate I  refer back to a drawing I did for my book showing the correct placement of features.  I hang it next to my fused image. BONUS: the drawing happens to be almost the same size as face of my rider.  Using a ruler I hang in front of the fused face, I place pins to mark important benchmarks: top and bottom of the head, bridge of the nose, bottom of the nose.


From there, I make some nips and tucks and put the best face forward.

Now its right!

Now its right!

Share

Making Faces With My Friends

I’ve been away from the blog for a while, but that doesn’t mean that I haven’t been

writing. In fact, my fingers are nearly worn down to the first knuckle due to non-

Debbie Fishell worked from a baby picture of her husband.

Debbie Fishell worked from a baby picture of her husband.

stop typing these months of June and July. Among the various writing projects, the most exciting is that I’m working on a book titled The Thread Painted Portrait. It presents my techniques for creating a fused fabric foundation covered with threadwork. Now that the manuscript is being edited, I have a chance to stop and reflect on the publishing process and share some of it with you. This is just an introduction to be followed by several installments about the trials and celebrations I experience in writing this book. Check in and follow my progress, and look for the book hot of the press by the end of October.

First, Why write a book? I’ve beenteaching my portrait quilt workshop for several years now where I teach the fused foundation technique. It’s a real kick to see faces emerge from the fabric, and

Judy Armstrong added a pop of color.

Judy Armstrong added a pop of color.

an even bigger kick watching others get excited when they produce a portrait. Take a look at some of the portrait quilts that students have done.  Everyone adds their own special design element to their piece.

If you’ve seen my work, you know that this is only the beginning for me. After creating the fused fabric face, I spend hours covering it up with miles of thread. Invariably, in a workshop someone will ask me to teach them to thread paint the face. Being able to do something well requires a certain level of understanding and skill development. However, the ability to teach that technique to othersrequires an even greater level of skill and understanding.

Judy Liebo combined two very special images.

Judy Liebo combined two very special images.

It is only recently that I felt that I understood my process well enough to adequately share it with others.

Laurie Carson with her best friend.

Laurie Carson with her best friend.

Share

Bike Boys and Road Trip

This has been a BIG week.  I traveled to Paducah this week with my parents, Willis and Dixie, for the AQS Quilt Week festivities.  I received a first prize in the Small Wall Quilt, Pictorial category for my “Panning for Gold,” and met lots of wonderful quilters.  We were actually in Paducah for just over 24 hours, but, thanks to Dixie on a motorized scooter, we barely stopped moving.

Lunch on the Curb

Lea with parents in Paducah

In spite of the out of town time, I still made progress on thread painting the Bike Boys.  I now have the first 2 guys stitched.  With a win at Paducah, I’m energized to get this piece done in time to submit to the show in Houston in November.

This is the front man.  I’m not totally satisfied with his face.  I’might give him a mustache.

Here is the second man.  I rather like him, but I will need to do some additional shaping of the hat after I stitch the background figure. Below, see the 2 guys together.

Share

Adam and the Paperectomy

Finally, it’s time to begin work on the people in this composition.  I’m going back to the beginning, the first image that I fused with

The vest in cool reds

fabric, the man in the background on far right.  Since he is first, I’m calling him Adam.  Because he is a less significant figure, I’m using him as a warm-up to the big buys on the bike.  I started with the vest, using cooler reds than in the bike frame so as to push it into the background,

I move next to the face, again selecting a group of cool grays that will fall back from the warmer tones I will use on the actual bike boys.

The face emerges

Finally, I work on the coat.  This is where I find that the dimensions on the arm are messed up.  I will try to redefine them with thread by making the upper arm wider, and shaving off some of the lower edge of the fore sleeve with darker thread that will put it into shadow sooner.  Check back later to see how this works out.

Got to fix that sleeve

Stitching people is a bit intense. when I have only a short period of time to work and don’t want to dive into the details, I move to the background and begin filling it in.  I discover that this too, presents problems.  While stitching, I begin to hear a clicking noise.  Investigation reveals that I didn’t remove a piece of backing paper before assembling this portion of the work.  I need to go in and get it. I declare the need for a “paperectomy” and prepare for surgery.  See this delicate operation below.  The important thing is to make incisions through the layers at various places.  Once done, I can stitch over the area and seal up the cuts that I’ve made.  The patient will survive with no permanent scars.

Horizontal cut through tulle

Scissors under tulle make vertical cut through fabric.

Loosen and remove paper.

Share

Life in the Shadows and the Golden Mean

One line through many elements

With a week off work, my travels over, and all guests have gone home, I’ve been able to make great progress on the Bike Boys.  While traveling, I did pickup some new brown fabrics with deeper, darker shades.  I used them to replace some earlier choices, hoping to strengthen the color schemes for some of the bikers.  I think it worked.  My second bike boy really pops forward.  I also built the foreground with rich tones for the sidewalk and street (you were right, dad), and added the cooler grays for the background.

Originally, I had chosen to delete the figure standing in the large dark space, but when I saw it on the wall, I knew he needed to rejoin the party.  When I added him, I made his features vague and used a very narrow range of value.  This served to push him farther into the shadows and create a third plane within the composition: bikers in the foreground, onlookers on the sidewalk, and this guy in the background. I also raised him up just a bit so that he sits on a tangent in line with other figures in the piece. He will  become the top of a triangular shape within the piece. I pinned the string across the design wall to show this.

Next, I realized that the top of the piece has reached the approximate 2/3 mark.  This got me thinking about the golden mean and how it can be used to create a pleasing composition.  The golden mean refers to a ratio of  3/8 or 5/8, but many people use thirds, because its easier.  If you don’t know about it, it’s worth a google search.  I placed pins at the corners and at the 1/3 marks along the edges and then wrapped string around the pins to create lines joining each of the points.  Placing objects along these lines helps to create a pleasing composition and can be used to guide the eye around and through the piece.  Also, the places where these lines cross could be considered power points.  It was exciting for me to see how often these lines were working with my composition.

So many connections!

 Here are some things to note:

  • the first line crosses the eyes of the man in shadow, then the face of the man behind the bike, grazes the top hat of biker #2, runs along the hat shadow of biker #1, and then connects to the hands of the man inside the window and the man in the red vest.
  • biker #1 is centered within a triangle  created under the 1/3 point and his elbows fall at a power point
  • the face of biker #2 falls at a power point, and so will the face of #3.
  • The tangent that falls through the face of biker #2, hits both elbows of biker #1 before grazing the handlebar and the toe of the red vest guy.
  • The tangent that will cross the hat of biker #3, also flows along the leg of biker #1 and near the bend in the fork of the bike.

I’ve got to take the lines down now so that I can fuse more fabric, but I’ll put them up again when it all comes together.

Share