I’ve managed to get the first two panels of my 4 Horsemen triptych fused together and have come to terms with the reality that I will not get the 3rd panel finished in time for my May deadline. I will make the 3rd panel—someday—maybe in the summer.
Before I can begin stitching, I must to do some planning and prep work now if the three panels are to fit together later. Toward that end, iI want to make sure that each panel works individually AND in concert with each other.
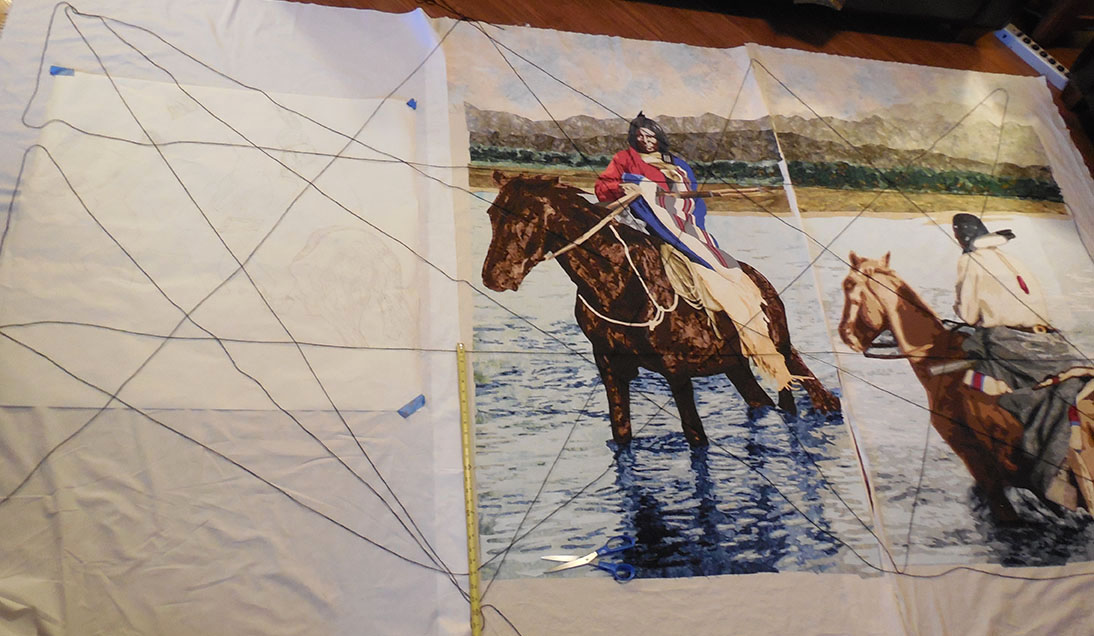
Panels side by side
Here is the process:
- Lay the panels side by side. (Panel 3 is just a large sheet of muslin)
- Mark the corner points and 1/3 marks along each side.
- Run a line of string string between each of these key points.
In doing this, I can accurately place lines of the riverbank, foothills, mountains, and place the final riders in just the right position. Additionally, this web of string creates a grid for identifying key lines and points of intersection within the piece.
Here is my dilemma: the whole thing is way to large to fit on my design wall. The best I can do is clear the floor in my family room and lay out the panels. Unable to pin into the hardwood floors, I’m left to lay the string on the floor and they won’t stay put. They are continually shifting as I move things around under them. Eventually, I do get a sense of how things are laying out.
I see some good things going on in the right panel:

Lines o the right panel
- A diagonal goes down the face, hits the shoulder, belt buckle, then follows the line of the tail
- Another diagonal follows the line of the neck, a crease in the blanket, and the shadow of the back haunch.
- The lower horizontal connects the reins, rifle, and blanket fold
In the center panel:

Lines on the center panel
- A diagonal connects the hand, a stripe of the blanket, a line of rope, and then runs down the back leg
- Another connects the eyes, bottom of the rope and follows the tail.
- The lower horizontal runs along the belly of the horse
In the left panel:

Lines on the left panel
- I place the horses in the center between the horizontal strings
- Diagonals from the upper left corner will fall along the head and back of the horse and also connect the nose, chest and stirrup.
- I also sketch in lines for the background so that it will all come together in the end.
Doing this on the floor stinks! Every time I move something, I have to reposition the strings. To make things worse, my trusty companion, Coco, has her own ideas about the placement of these strings. I love her, but I REALLY don’t appreciate her design sensibilities.

Coco tries to help
