Tag Archives: pictorial quilts

Color Temperature

Color Temperature: Fabric Fever is Cause for Concern

Can color temperature indicate the health of your quilt? These days, having a fever is cause for concern. Staying home and

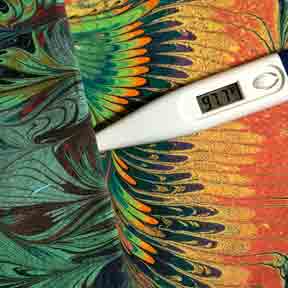
Does you fabric have a temperature?

away from others gives me more time with my fabric, where temperature has also been on my mind. It was a topic in my monthly Color & Composition class.  Read on for a summary of our discussion and learn how you can join us next month.

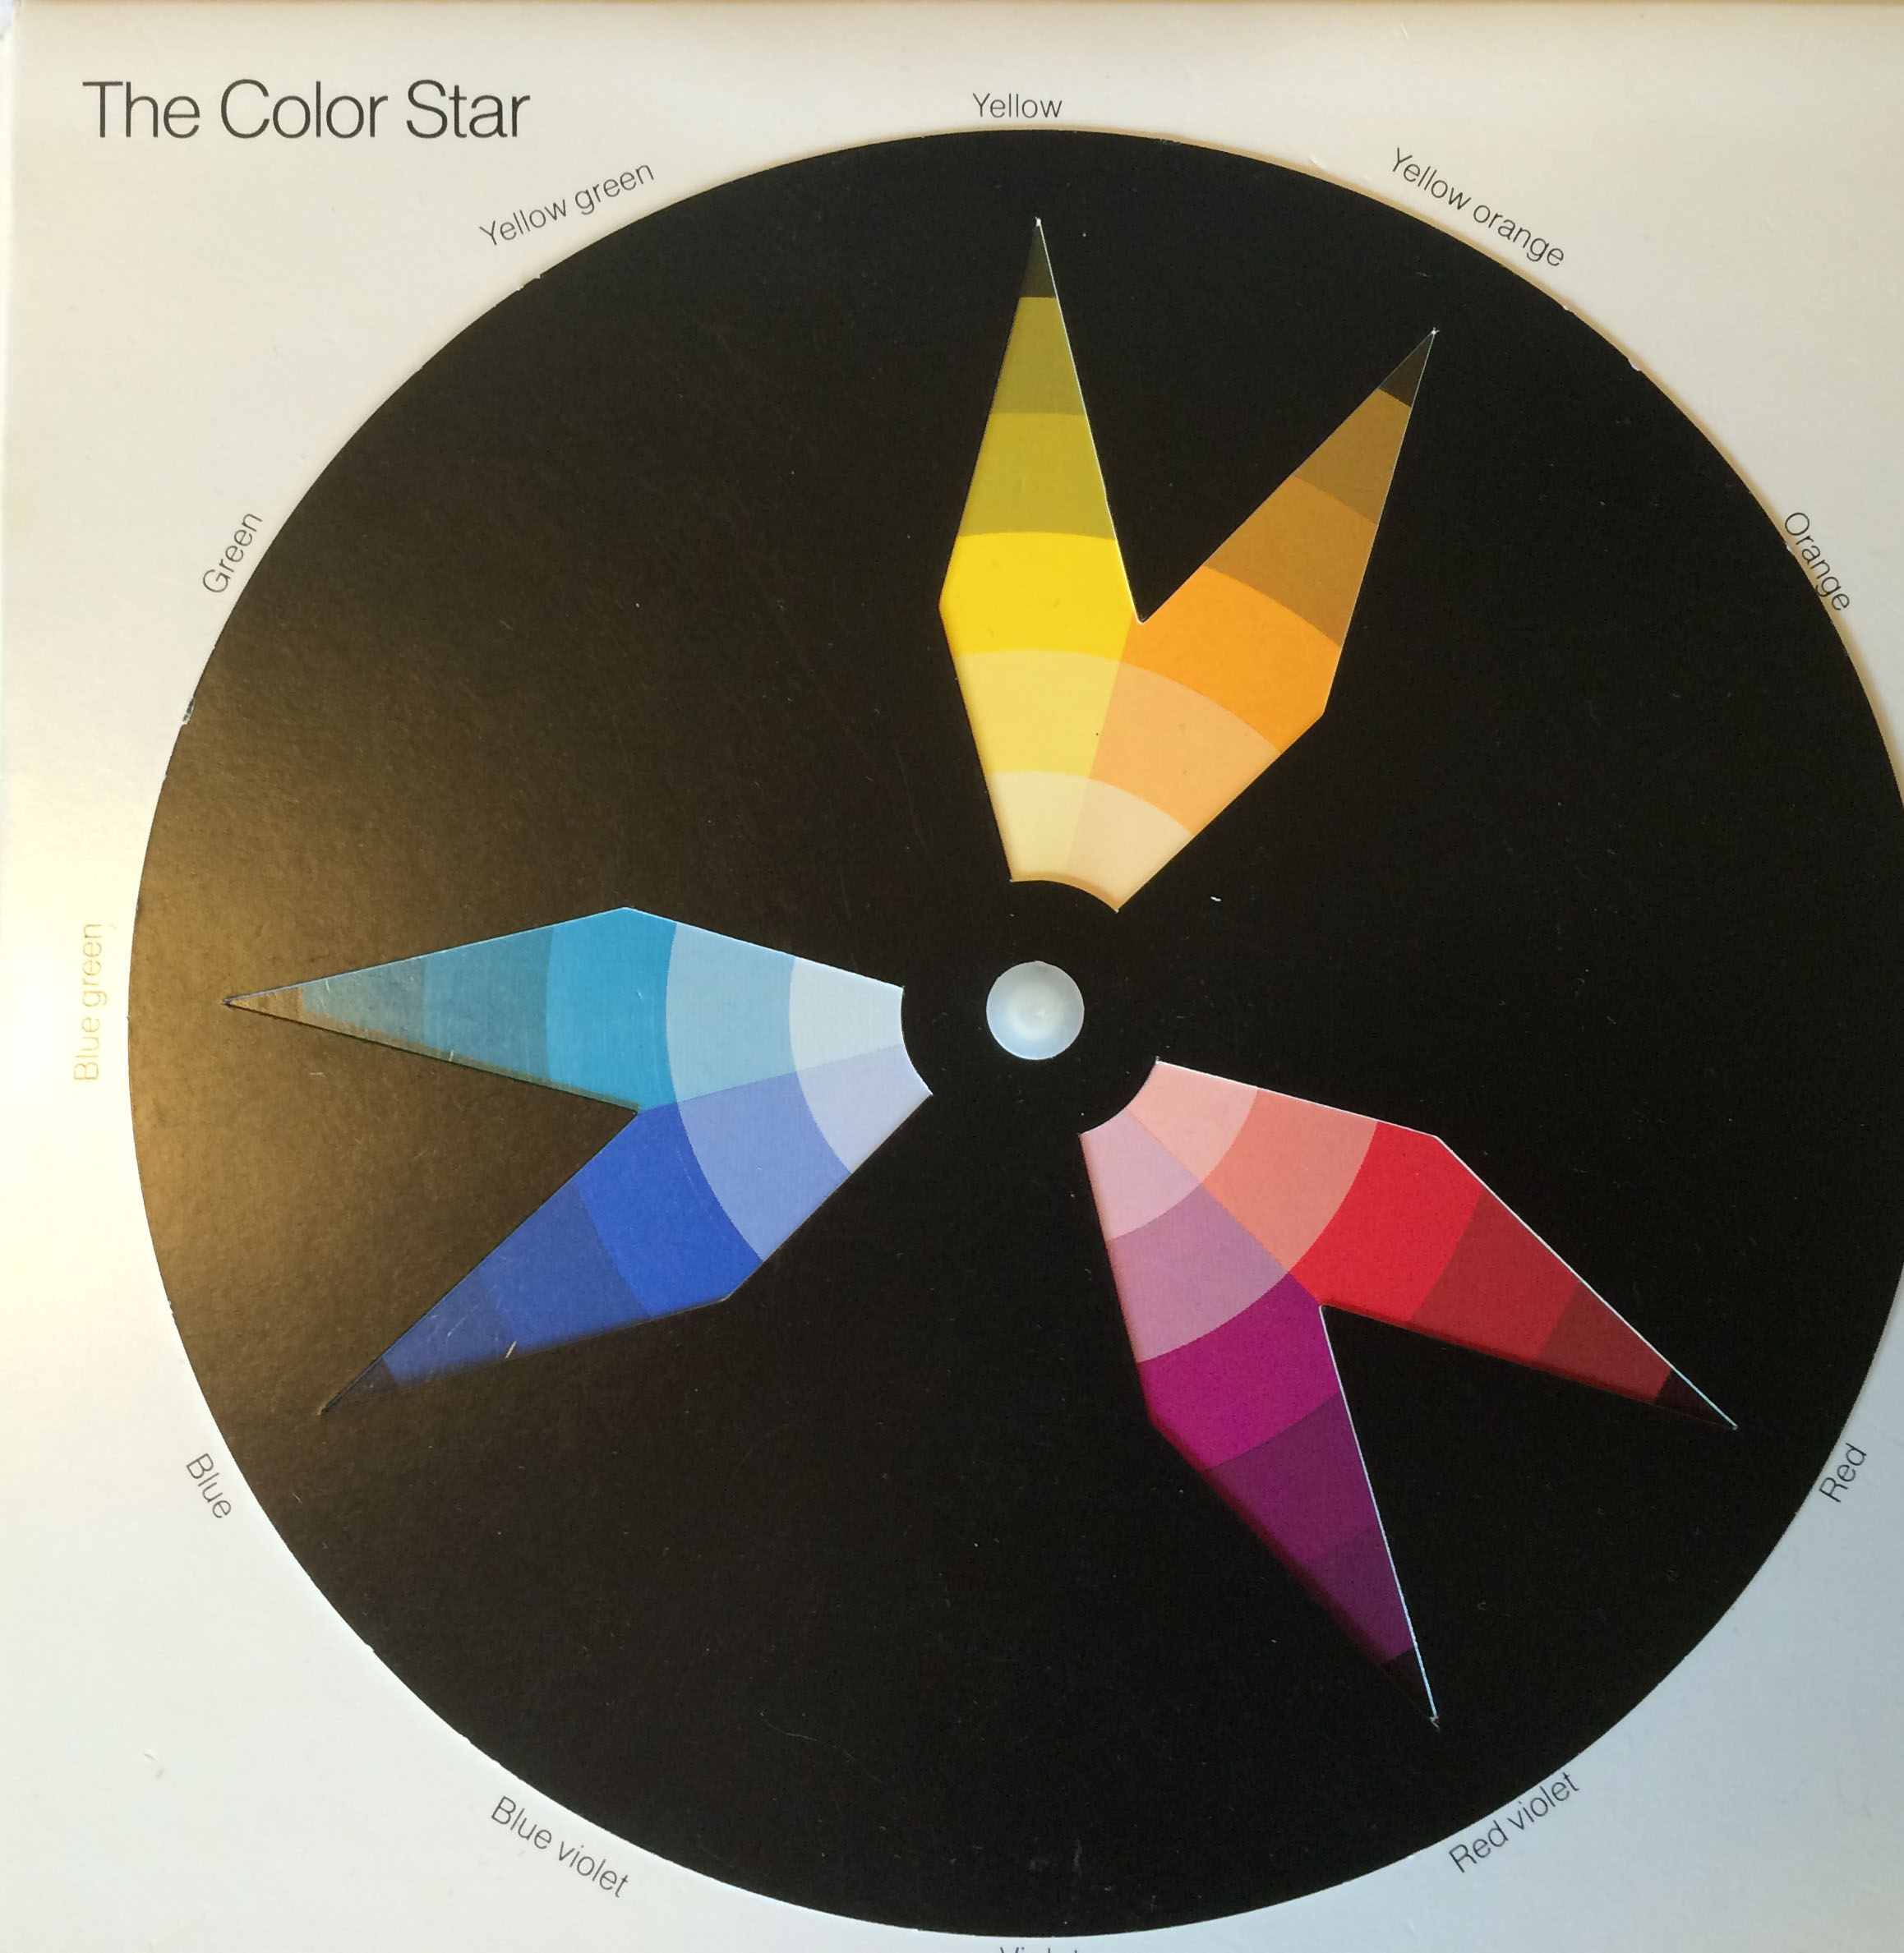
Color Temperature:  What is Warm? What is Cool?

The exact dividing line between warm & cool colors has been an open topic for centuries.

various versions of color temperature

What is your preference?

Your preference likely depends on your medium: a digital graphic artist lives in a different color world than a fiber art quilter.  Here is what I work with…

my take on color temperature

Here are my play groups for warm and cool colors.

I also think of red and green as temperature neutral.  They can function with either play group, but will be the coolest kids in the warm group, and the hottest kids in the cool group.

color temperature - warm

What’s cool in the warm group?

color temperature - cool

What is warm in this cool group?

How Color Temperature is a Tool?

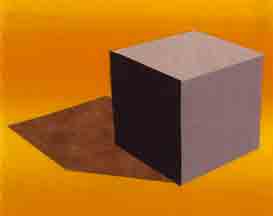
It’s a fact that warm colors advance and cool colors recede!  In a composition, we can create a sense of depth using temperature.  Warm colors will seem closer to us and cool colors will fall to the background.  Or do they?  Do we know this because someone told us, or because we have experienced it?  I say, “You don’t really own that knowledge until you test it out.”  

So, I created a series of simple compositions of a box on a background.  These are only  8 x10 inches, easy to make, and keep on hand for future reference.

Color Temperature: Warm vs Cool – Round 1

First, here is a box in a warm color sitting on a cool color background. 

Does the box visually pop off the surface?

Now, here is the reverse: a cool color box on a warm color background.

What about this box?

If the concept holds true, the first version should appear to have more depth, and the background should fight for dominance in the second.  What do you think?

Color Temperature:  Warm vs Cool – Round 2

In my next experiment, I pitted warm and cool colors against each other in the same composition.  Using a temperature neutral color green for the back ground, I put a large and small box together in the composition.  Size will indicate to the viewer that the larger box is closer, but, how does color temperature amplify, or mute that message?  


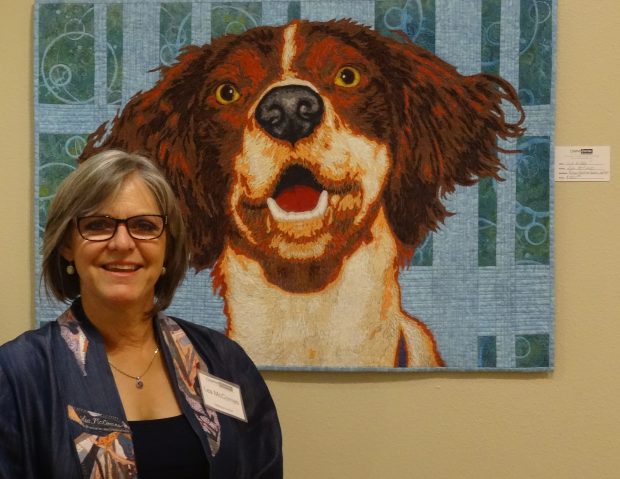
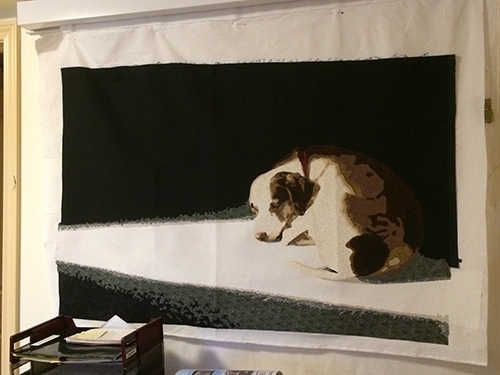
Warm vs Cool in Pictorial Quilts

These examples are very dramatic, but the concept can be used in more subtle ways.  Color temperature is relative.  Even within the “Warm” or “Cool” color play groups, each color will appear warmer, or cooler depending on what color plays next to it.  For example, orange is cooler than yellow, but warmer than red.  Also, blue is cooler than green, but warmer than violet. 

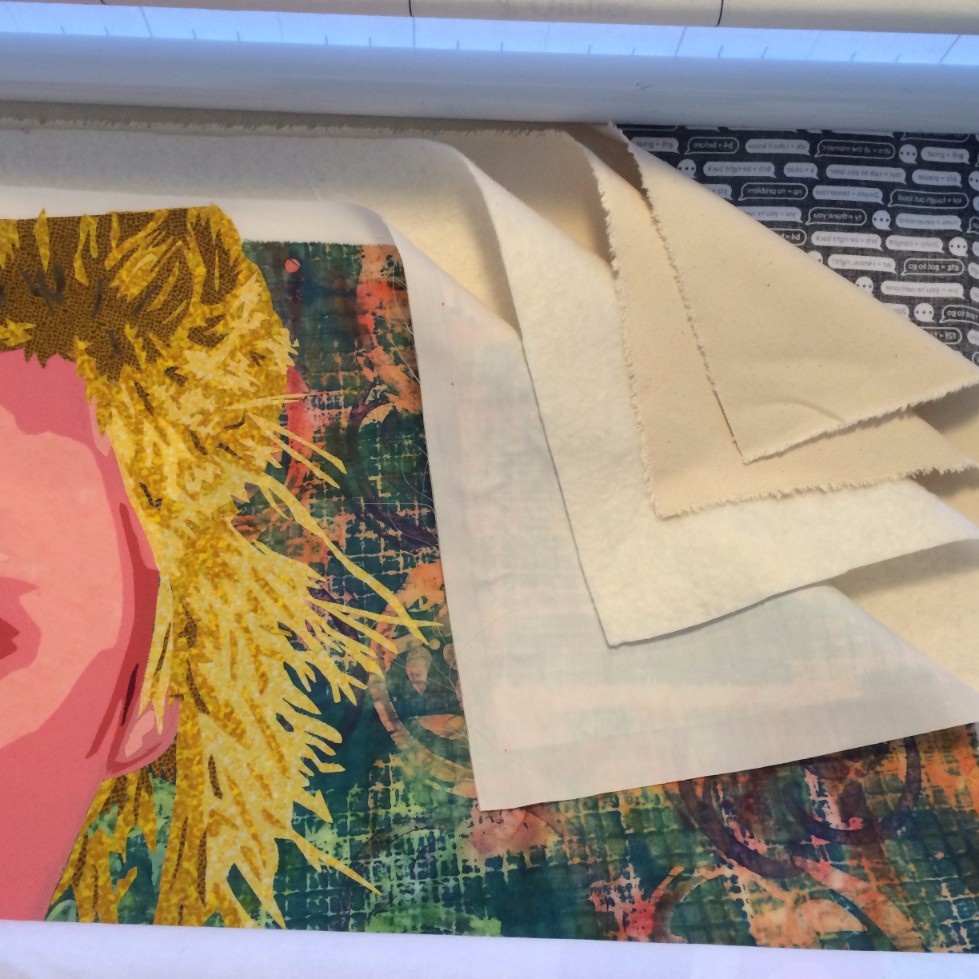
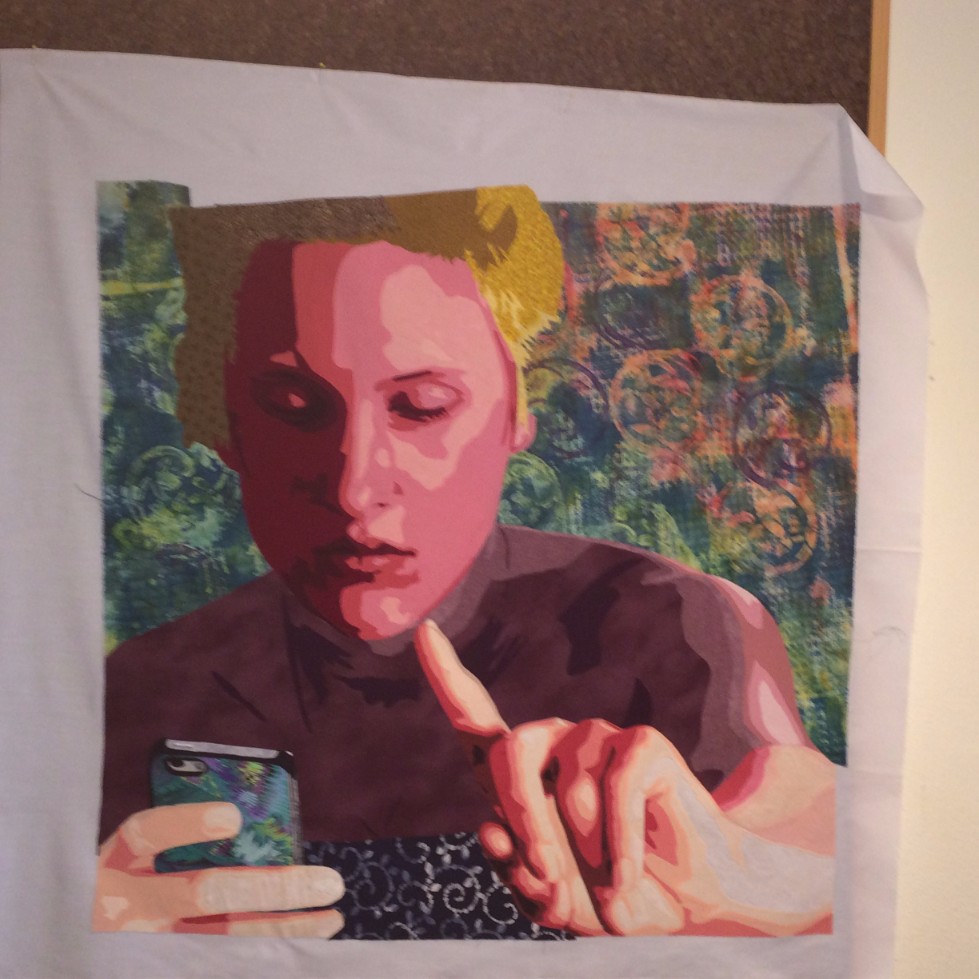
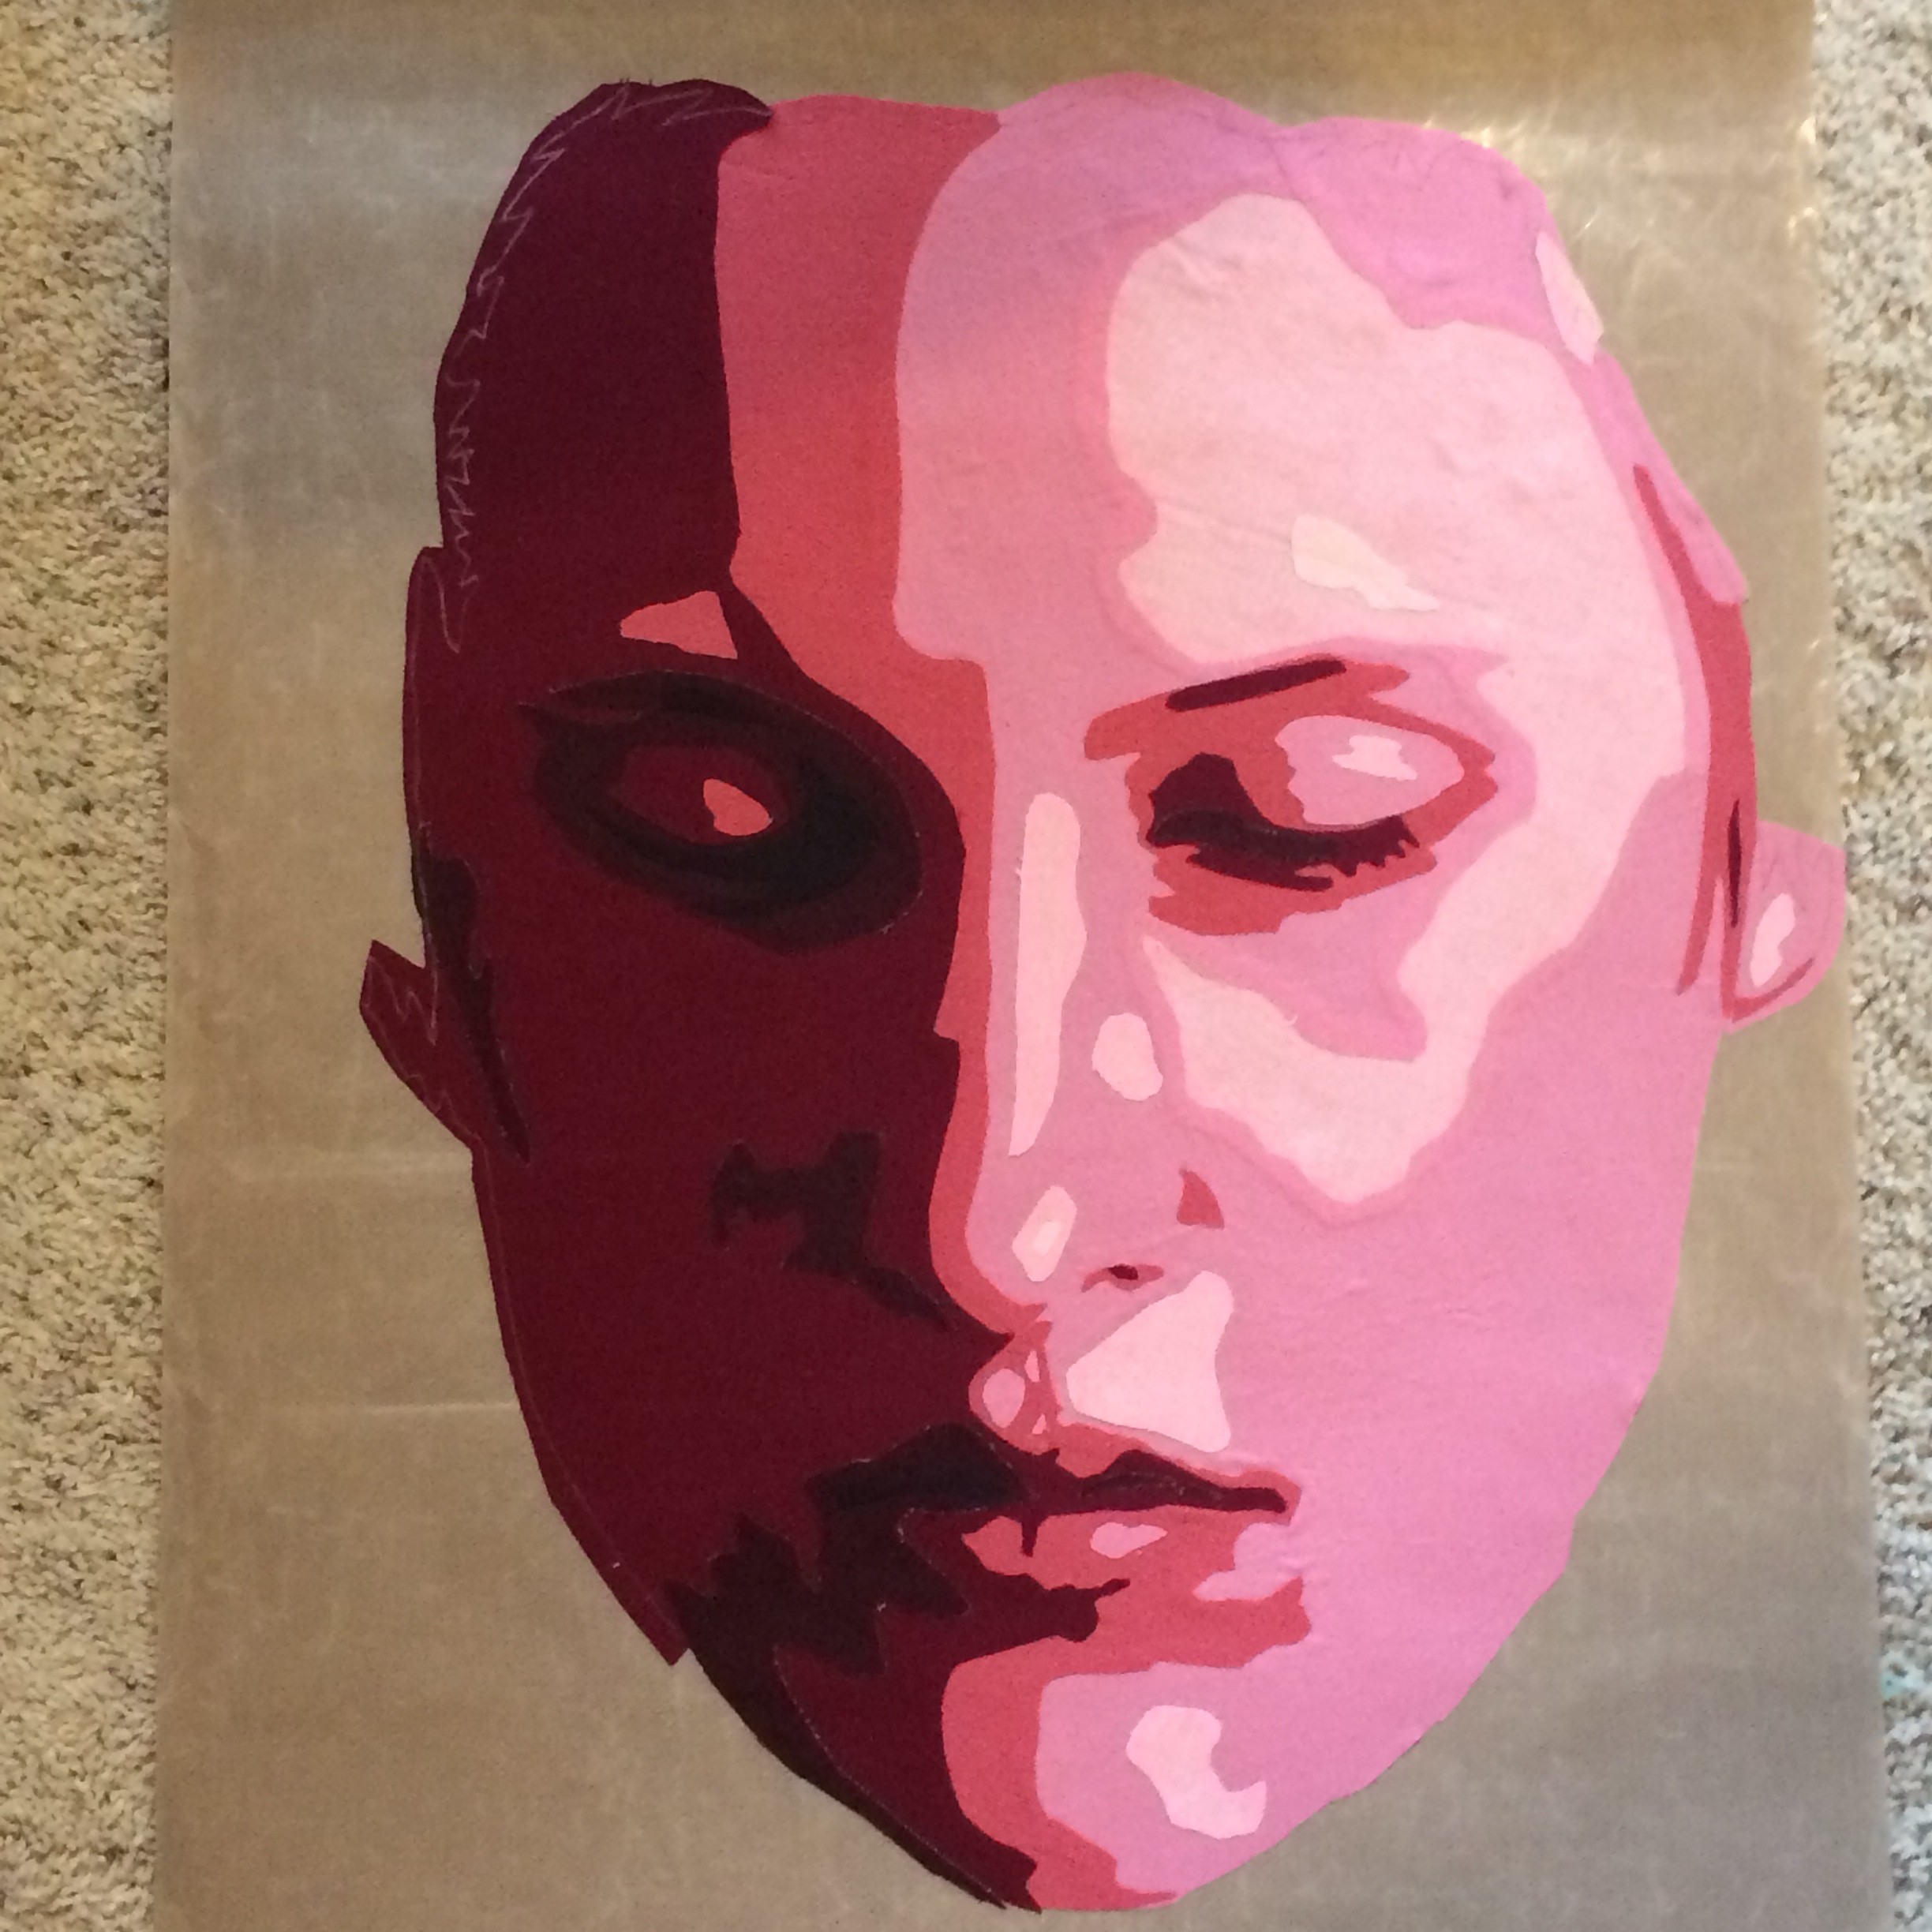
I use this concept in all of my work.  Look through my genre and portrait galleries to see how warm tones advance from the cooler backgrounds.  When more than one person is included in a composition, I employ subtle temperature changes in flesh tones to make one figure more prominent, or appear closer than another. 

Which figure has the warmer complexion?

How does temperature amplify depth in this piece?

Experience is the Best Teacher

Now, if you really want to own knowledge of this concept, you need to conduct your own experiences.  It can be a simple as cutting out some circles of various sizes and colors, and then experiment with placing those circles on different backgrounds.  You don’t even need to fix them permanently.  Try one version, take a photo, rearrange, and take another photo.

If you try this, share a photo of your experiment with me:  Lea@leamccomas.com

Learn More About Color Concepts

Every month, I teach an online Color & Composition class through the Rocky Mountain Quilt Museum.  We meet via Zoom on the 4th Saturday of every month from 1:00-3:00 (Mountain Time zone).  Each meeting is a chance to explore a color concept, a color scheme, and a composition concept.  Come every month, or participate when you can.  The cost is $20/ session. Click this link to join us.

Here is what we’ll be exploring at our next meeting on January 23:

Color Concept: Creating Depth

Color Scheme: Analogous

Composition Concept: Variety & Unity

Sign up for the next Color & Composition class with Lea McComas

Share

New Work: Dogs & Cats

My last blog entry was last summer when I gave a teaser about my new work, and now, we’re fully in the winter holiday season. Has it really been that long?  The winter solstice, at our house, is a time to stop and reflect on the events & accomplishments of the closing year, and set goals and expectations for the approaching year.

Body Building

I set a goal last year to lose some weight and get in shape (sound familiar?). My body building efforts were really about  building up a body of new work.

Got Kibble? at CF Gallery opening,

Got Kibble? is just one of the new works that I completed this year.  It was a hands-down favorite at my show in the Creative Framing Gallery in Louisville, CO in Sep-Oct.  Pet compositions are fun to show in the Boulder area is because we are such an animal oriented community.


Cat Nap, 44″ x 24″, fabric & thread, © Lea McComas, 2018.

Not to be left out, that other favorite pet, the cat, is featured in my new piece, “Cat Nap”.  This work was inspired by a photo I took while traveling in Greece, back in the mid-1990’s.

Pet Portrait class sample

Previously, I completed a couple of small studies using this image.  Two versions were made for my online Pet Portrait class. Here is one with a tetrad color scheme. Prior to that,  a small work was donated to a charity event. Finally, after 20 years, the full up composition has come to fruition. Now, it’s subtle charm makes it one of my new favorites.

Cats VS Dogs?

At the show, a survey of viewers revealed that cats are more popular pets than dogs. Now, I’m getting a lot of pressure (and fun photos) for a series featuring cats.  What about you? Are you a dog person? or a cat person?

I’m thinking dogs rule.

    Cats rule, Dogs drool!

Stay tuned, there is more work to share in a future blog. In the meantime, if you’ve been inspired to attempt your own pet portrait in fabric, check out my online Pet Portrait Memory class with The Quilting Company.

No time for that?!?  I do commission work.  Contact me and let’s talk about capturing a favorite image of your pet in fabric and thread.

Border Wall Quilt Project

Can’t write a blog without mentioning the Border Wall Quilt Project.  We’re still accepting bricks and the wall continues to grow.  

Share

Vigil is Finished. See This Endearing New Work

It is exciting when a new work is completed. Vigil is finished and I’m thrilled with the results. It’s been photographed and added to the Genre gallery on my website. However, in this week’s blog, I want to share some of the details.

The lonely dog, a faithful companion, lies, waiting, and ever hopeful of the return of a loved one.

Vigil: Stitching the Dog

One challenge I faced in stitching the dog was to get the direction of the hair just right.  Stella, the dog in this composition, is similar to my own dog, Bosco.  So, anytime I was uncertain about the direction I should be stitching, I would sneak up on Bosco as he napped and use him as my reference.  Of course, he would wake up and expect to be held and petted in return for his services.

Lea McComas Fiber Art - Vigil detail

Detail of dog hair

Lea McComas Fiber Art - In the Studio

When you ask Bosco for help on a project, he is all in.


Vigil: Creating Depth

Lea McComas Fiber Art-Vigil

subtle value changes create feeling of depth

Another challenge was to give a sense of foreground and background.  For this, I rely, as I often do, on value changes. It is very subtle, but the black fabric used at the lower edge is slightly lighter than the dark fabric used for the upper part of the composition.  This subtle contrast was  enhanced with the thread choices in the stitching phase.  As a viewer, you may never consciously notice the changes, but the image will register in your mind as having depth.  Also, creating a broader field of gray below the white band brings that area forward.


Vigil: Stitching the Background

Lea McComas Fiber Art-Vigil detail

Subtle changes in thread and stitch design hint at what’s behind.

A final challenge was to add variation and subtle detail to the very large dark background area. I wanted to give the impression of a floor with a wall in the distance, but didn’t want to get too specific on where one transitioned to the other, and also wanted to maintain the feeling of a dark abyss.  For this, I employed a circular stitch design for the carpet, and an elongated vertical stitch pattern to represent the wall and then varied where I transitioned from one pattern to the other.  I also used two threads in this area: a solid black in the area around the dog, and a variegated thread of very dark values as I stitched further away from the figure.

In the end, I think this resulted in a very sweet piece that will be hard to part with. However, plans are already being made to exhibit this piece. When things finalize, I’ll let you know.  For now, visit the Genre Gallery of my website to see some of my other works.  You may notice another new work, Cruisin’.  I’ll be sharing the story of this piece in the weeks to come.

Share

I Use Pets to Inspire Others, and Inspired Myself

Pet Portraits

We love our pets, don’t we??  Two years ago we made a frantic, late-night trip to the emergency pet clinic.  Three hours later, we came home without our precious Gretchen.  It was devastating.  That’s why I jumped at the chance this winter to put together a class where my portrait techniques are applied to Pet Portrait Memory Quilts.

I’m a dog person with lots of dog pictures.  However, in this class I wanted to address pet portraits for a variety of animals: cats, birds, horses, in addition to dogs.  So, I put out the call for precious pet photos to my friends and colleagues and found myself with many more great photos than I was able to use for the class.

I made some adorable samples for the course.  A few of them are included in this post.  As you can see, for these, I simplified the compositions.  I did this to teach the techniques and focus on specific art concepts. I’m hoping that students will learn the lessons and then apply them to more complex compositions.

I Inspired Myself

More complex compositions:  now that sounds like advice I should follow myself.  So, I went back through the photos and set aside a few more images for a new series.  The exciting thing for me is that these new compositions will include more context and will tell a larger story.  I’ve chosen some images that address the reasons we have and cherish our pets: loyalty, companionship, comic relief. . .

Last year, I completed Puppy Love.  That will soon be joined by “Vigil.” This second piece in the series is still a work in progress, so stay tuned to see how this piece and the rest of the series develops.

Cat Lovers Stay Tuned

And, if you’re a cat person, don’t worry.  A cat series is soon to follow.

Share

Moving from Fabric to Thread

Shifting gears, moving to the next phase, changing the focus; that’s what I’ve been doing in these last couple of weeks as I transition from the fusing stage of my project to the stitching stage.  I find it helpful to take a break and clear my head so that I can look at the project with fresh eyes.  So, during this period, an idea that has been floating around in my brain for several years actually came alive and demanded to be brought to creation.  I’ll img_1201share that with you in a few weeks.  It is a total departure from this project and did allow for the fresh perspective I needed.

Before going of on this side trip, the fused fabric foundation for “We Don’t Talk” was loaded onto my longarm machine.  You can see here all of the layers and how they are placed.  If you’ve done your own thread painting, you may know that it is always a struggle to end with a piece that lies flat.  I’m always on the quest for a better solution.  In the past, I’ve used a layer of raw artist canvas. This has been marginally successful, so, this time I will use 2 layers positioned under the batting so that the grains are perpendicular to each other.  I’m giving it a shot, but the tradeoff is weight.  This baby is going to be heavy for it’s size.img_1199

(2 weeks go by)

Thread, thread, so much thread needed.  Just as with my fabrics, I like to create selections for each element in the project, and just like with fabric, I use my trusty value scale to make good choices.  However, with threads, I usually put together sets of 7-10 threads: one each of the #1 and 5 values, and then two or three each of values 2,3,4.  However, given the size of the figure in this piece, I may have 3-5 threads in every value.  Here is what it looks like in my studio when the threads come out to play.img_1200

Hmmm, I think I’ll start on the face first.  Check back next week to see the progress.


Share

Finally, Finished Fusing

Yes, Finally, all of the body pieces are working together and creating the depth of field that I’m looking for.  With the face in place, I add some hair.

Helmet Hair

Helmet Hair

Yuck, that hair looks a bit too much like a helmet, but I’ll fix that when the background is in place.  I rehearsed several fabrics for the background and settled on a piece that I made a few years ago in a dye/print/paint surface design class that I took with Susan Brooks in Louisville, CO.

Periodically, I take a class that is out of my comfort zone, just to learn some new things and  get a fresh perspective.  That was Susan’s class.  I came home with lots of interesting pieces of fabric with no idea what would ever come of them.

Dye class fabrics

Dye class fabrics

more dye fabrics

more dye fabrics

How happy am I to find the perfect background in that stash of “experimental” fabrics.

Background ini place

Background ini place

Now, back to that hair….

more-hair

This is better.  Phase 1: Fusing is complete.

Share

Body Work

I’ve reached a place with my latest piece where I need to finalize a color scheme before moving on.  So far, I’ve only chosen fabrics for the flesh.  As I put these various body parts together, I’ve got to fill in the other elements of the composition (ie. dress, phone, background, hair.)  I use my Itten Color Star to work this out.

Color Scheme

Color Scheme


This Color Star is my favorite color wheel for making these kinds of decisions.  It comes with a full set of templates that let me block out colors I don’t want to use and let’s me get a better sense of what colors I will be  incorporating.

The hair is going to include yellow and yellow-oranges, while the phone will be blue-green, and her dress will be blue.

No decisions on the background yet, I’m going to put the figure all together and let it talk to me (or perhaps text me).

This week I’m able to complete the body along with the hand holding the phone. I’ve dipped into my special stash for the phone.  It is made from some hand marbled fabrics I picked up in Venice back in the 90’s.

A body to go with the hands

A body to go with the hands

Placing the face with the body, I have a real sense of progress.  I’m not sure about the darkness of the upper body, but I’m going to move forward.  I’ll audition some background fabrics before I decide whether or not to replace the body with lighter values.

A face with the body

A face with the body

Share

Talk to the Hand

The fusing has begun.  This week I was able to put together the hand for “We Don’t Talk”.   It is created from warm red-orange flesh tones that I hope will pop off the surface and give it a real “in your face” feeling.  For greater realism, I’m working with 7, rather than my standard 5 values.

The hand

The hand

Next, the face emerges from those cooler red-violet fabrics.  You can begin to see that there is a significant contrast in the temperature of these 2 features.  I hope it works as planned.

The face

The face

I’m liking the detail in the eyes and mouth.

Next week I hope to fuse the body and put the pieces together.

Share

Let’s Make Faces

Look what I did!

I hope you are enjoying a beautiful summer: picnics, camping, swimming, baseball…

But, when you are ready to come in, cool off, and do something creative, I invite you to join me in a portrait quilt class or workshop.  There are spaces open in these locations:

CraftU Courses are once again open for registration: 

 August 13 – Brigham City Museum, Brigham City, Utah.

Jo's self portrait

Jo’s Self portrait

September 30-October 2, 2016 – Quilt & Fiber Arts Festival, LaConner Quilt & Textile Museum, LaConner, Washington

October 15-16, Jukebox Quilts Store, Fort Collins, Colorado

Portraits on Parade

Portraits on Parade


“Portrait Quilt Workshop” Sat-Sun, October 15-16, 2016. Call (970) 224-9975 for more information.

January 19-22, 2017, Road to California Quilter’s Conference, Ontario, California

Share

Puppy Love, Part 2

Oh joy!!! I’ve finished something in less than a month; 2 1/2 weeks actually.  It’s such a thrill to jump into a project and just breeze through to the end.  With this piece, I took a break from thread painting and just did some dense stitching.  The new challenge was to establish some designs that would fit with each element of the composition.

The blonde hair of the girl was easy.  I used various values of yellow threads in long, undulated lines of stitching.

PL hair

Next, similar, but shorter, wavy lines were put down with some variegated threads in a pattern that alluded to the hair of the dog.  Several times I had to stop and pet my dear Coco’s face in order to really understand the changing direction of her hair.  She didn’t mind too much.

PL dog

Stitching the face was a leap of faith.  It is so tricky to stitch the face!  If you try to recreate the actual contours, and the lines aren’t just right, it throws off the perceived shape and makes the face look distorted.  I decided to go in a completely new direction: loop-d-loops.  I covered the entire face in a small repetitive design that had nothing to do with its shape or contour.  I still varied the threads, letting the values do the work.  I’m really pleased with the results.

PL face

The background was the most troublesome decision, just as with choosing the fabric.  The print was complex and busy.  Afraid that it would become too strong and overpower other elements, I didn’t want to stitch the printed design.  I came up with a wandering ribbon design with a tiny meandering stitch to fill in the spaces.  I feel like the 2 patterns of the fabric and stitching sort of neutralize each other and take away their power to dominate.

PL background

Finally, here’s the finished piece.Puppy Love

Share